8.7 KiB
WhisperLiveKit
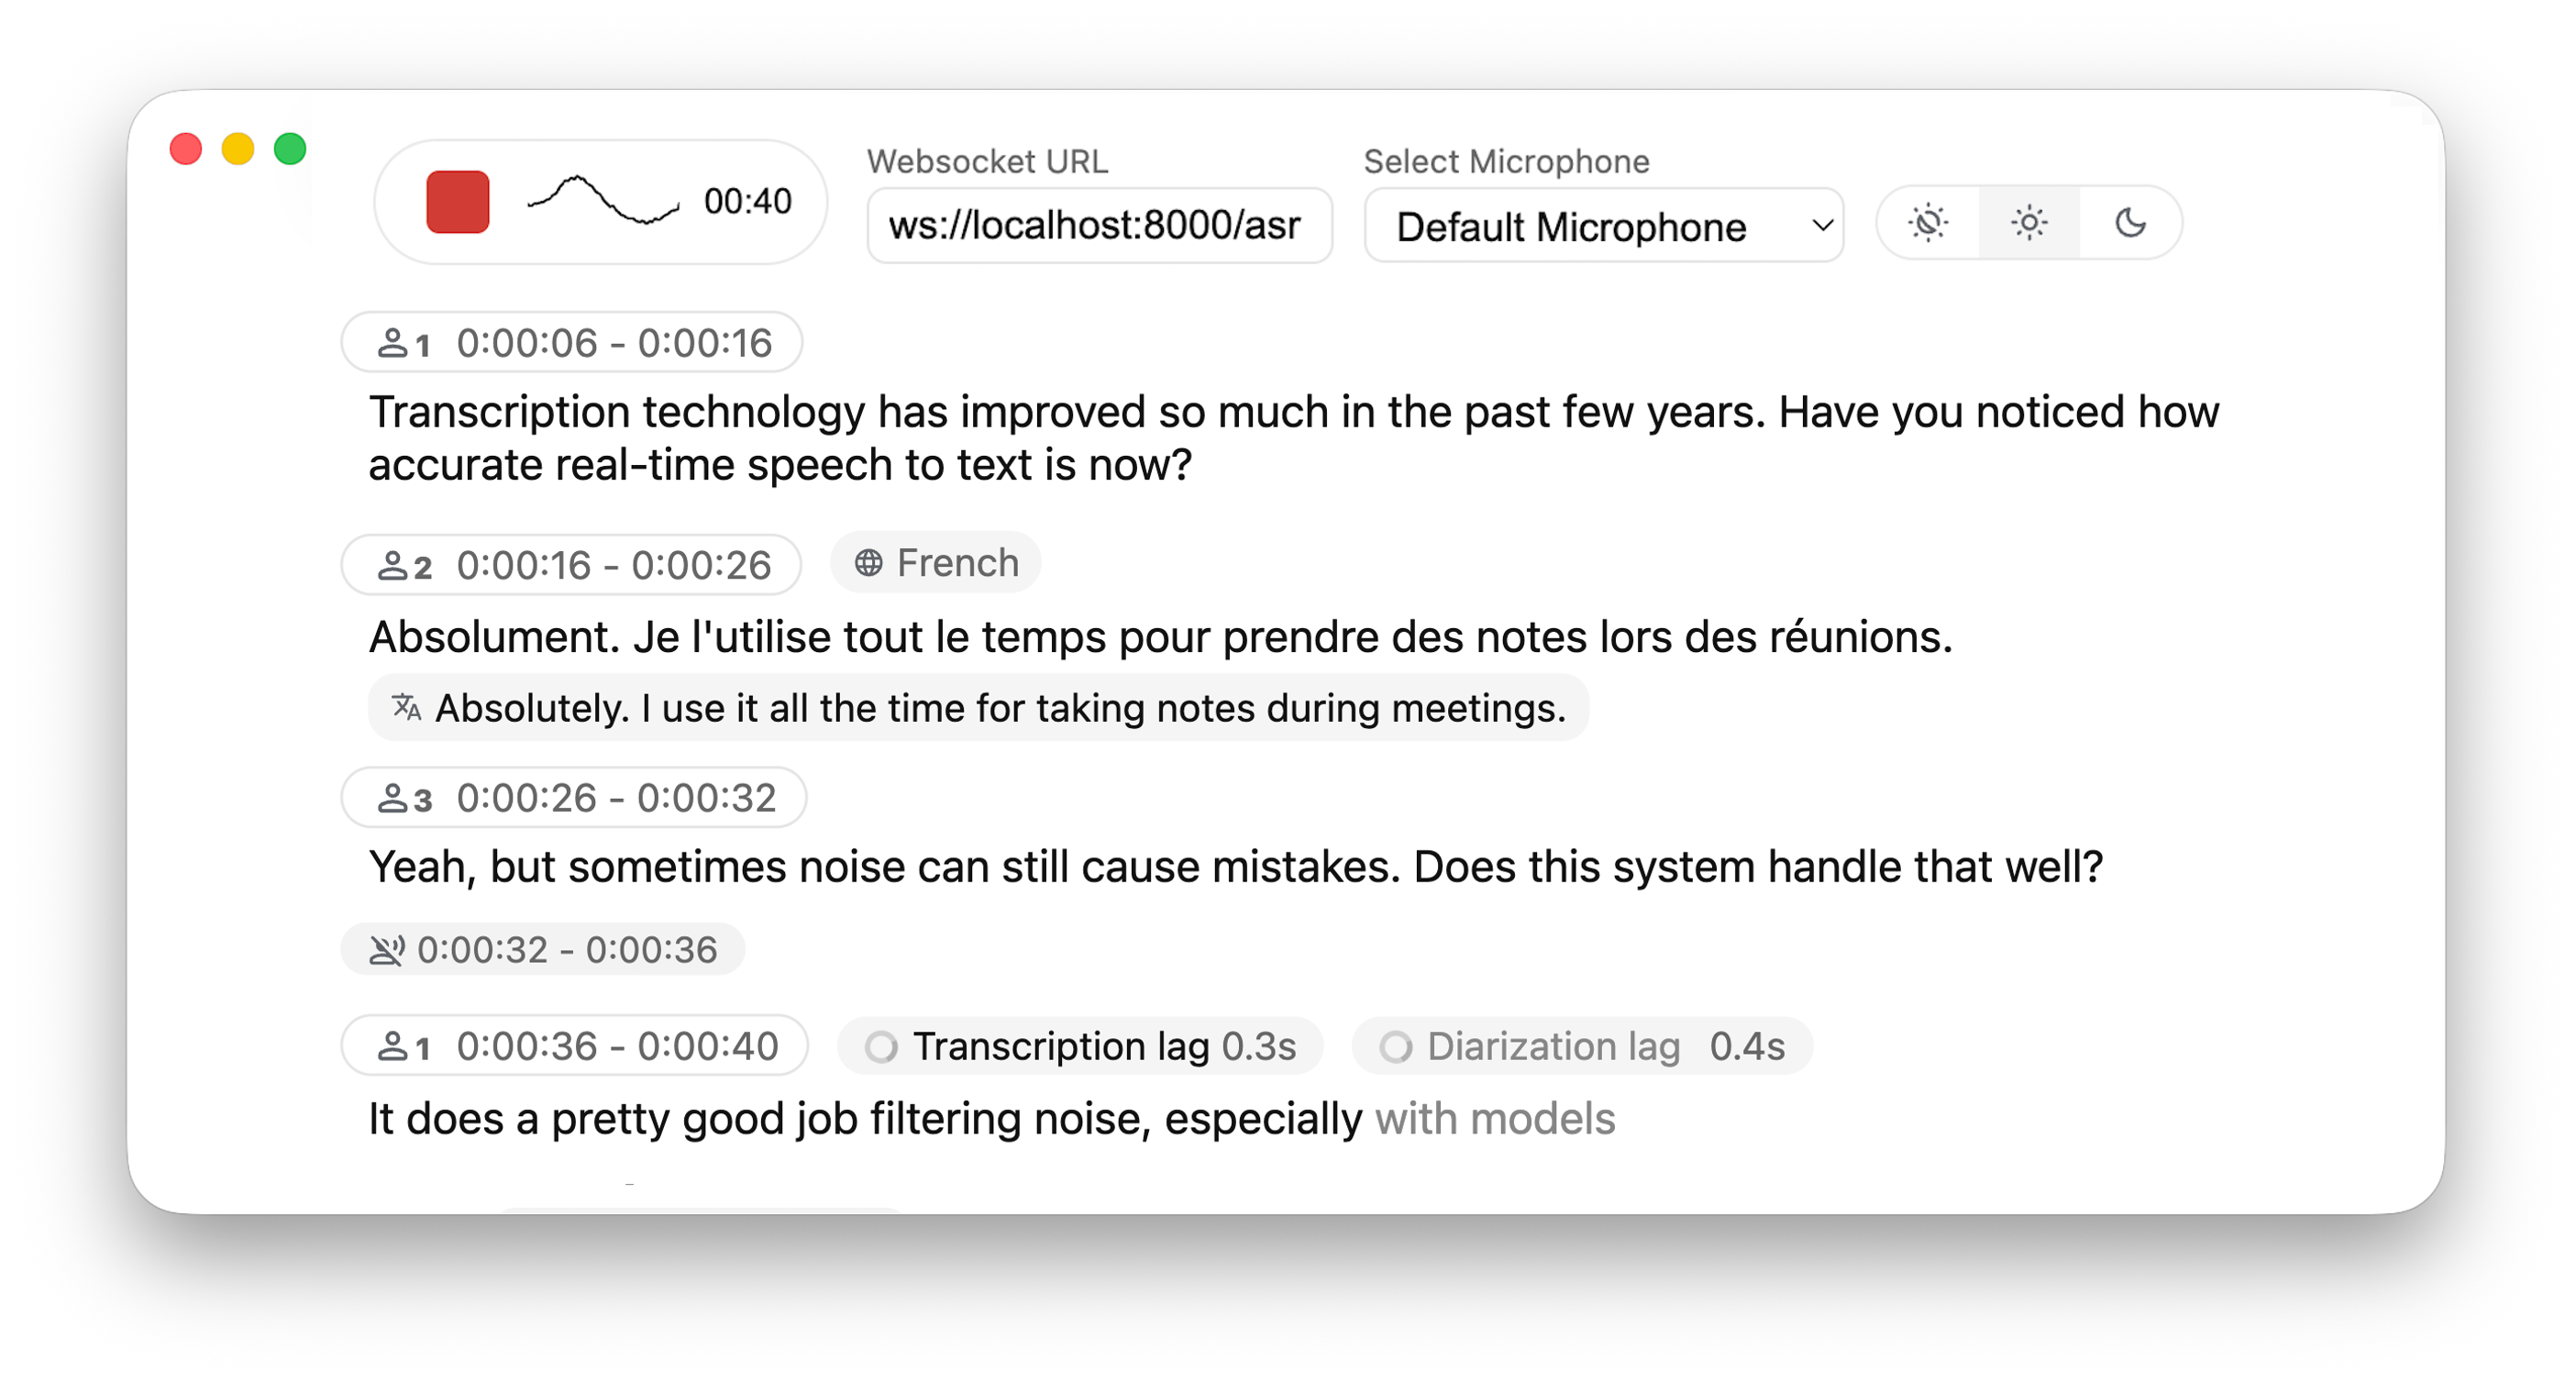
Real-time, Fully Local Whisper's Speech-to-Text and Speaker Diarization
This project is based on Whisper Streaming and lets you transcribe audio directly from your browser. Simply launch the local server and grant microphone access. Everything runs locally on your machine ✨
Differences from Whisper Streaming
⚙️ Core Improvements
- Buffering Preview – Displays unvalidated transcription segments
- Multi-User Support – Handles multiple users simultaneously by decoupling backend and online asr
- MLX Whisper Backend – Optimized for Apple Silicon for faster local processing.
- Confidence validation – Immediately validate high-confidence tokens for faster inference
🎙️ Speaker Identification
- Real-Time Diarization – Identify different speakers in real time using Diart
🌐 Web & API
- Built-in Web UI – Simple raw html browser interface with no frontend setup required
- FastAPI WebSocket Server – Real-time speech-to-text processing with async FFmpeg streaming.
- JavaScript Client – Ready-to-use MediaRecorder implementation for seamless client-side integration.
Installation
Via pip (recommended)
pip install whisperlivekit
From source
-
Clone the Repository:
git clone https://github.com/QuentinFuxa/WhisperLiveKit
cd WhisperLiveKit
pip install -e .
System Dependencies
You need to install FFmpeg on your system:
# For Ubuntu/Debian:
sudo apt install ffmpeg

# For macOS:
brew install ffmpeg

# For Windows:
# Download from https://ffmpeg.org/download.html and add to PATH
Optional Dependencies
# If you want to use VAC (Voice Activity Controller). Useful for preventing hallucinations
pip install torch

# If you choose sentences as buffer trimming strategy
pip install mosestokenizer wtpsplit
pip install tokenize_uk  # If you work with Ukrainian text

# If you want to use diarization
pip install diart
Diart uses pyannote.audio models from the huggingface hub. To use them, please follow the steps described here.
Usage
Using the command-line tool
After installation, you can start the server using the provided command-line tool:
whisperlivekit-server --host 0.0.0.0 --port 8000 --model tiny.en
Then open your browser at http://localhost:8000 (or your specified host and port).
Using the library in your code
from whisperlivekit import WhisperLiveKit
from whisperlivekit.audio_processor import AudioProcessor
from fastapi import FastAPI, WebSocket

kit = WhisperLiveKit(model="medium", diarization=True)
app = FastAPI() # Create a FastAPI application

@app.get("/")
async def get():
    return HTMLResponse(kit.web_interface()) # Use the built-in web interface

async def handle_websocket_results(websocket, results_generator): # Sends results to frontend
    async for response in results_generator:
        await websocket.send_json(response)

@app.websocket("/asr")
async def websocket_endpoint(websocket: WebSocket):
    audio_processor = AudioProcessor()
    await websocket.accept()
    results_generator = await audio_processor.create_tasks()
    websocket_task = asyncio.create_task(handle_websocket_results(websocket, results_generator))

    while True:
        message = await websocket.receive_bytes()
        await audio_processor.process_audio(message)
For a complete audio processing example, check whisper_fastapi_online_server.py
Configuration Options
The following parameters are supported when initializing WhisperLiveKit:
--hostand--portlet you specify the server's IP/port.-min-chunk-sizesets the minimum chunk size for audio processing. Make sure this value aligns with the chunk size selected in the frontend. If not aligned, the system will work but may unnecessarily over-process audio data.--transcription: Enable/disable transcription (default: True)--diarization: Enable/disable speaker diarization (default: False)--confidence-validation: Use confidence scores for faster validation. Transcription will be faster but punctuation might be less accurate (default: True)--warmup-file: The path to a speech audio wav file to warm up Whisper so that the very first chunk processing is fast. :- If not set, uses https://github.com/ggerganov/whisper.cpp/raw/master/samples/jfk.wav.
- If False, no warmup is performed.
--min-chunk-sizeMinimum audio chunk size in seconds. It waits up to this time to do processing. If the processing takes shorter time, it waits, otherwise it processes the whole segment that was received by this time.--model{tiny.en, tiny, base.en, base, small.en, small, medium.en, medium, large-v1, large-v2, large-v3, large, large-v3-turbo} Name size of the Whisper model to use (default: tiny). The model is automatically downloaded from the model hub if not present in model cache dir.--model_cache_dirOverriding the default model cache dir where models downloaded from the hub are saved--model_dirDir where Whisper model.bin and other files are saved. This option overrides --model and --model_cache_dir parameter.--lan, --language Source language code, e.g. en,de,cs, or 'auto' for language detection.--task{transcribe, translate} Transcribe or translate. If translate is set, we recommend avoiding the large-v3-turbo backend, as it performs significantly worse than other models for translation.--backend{faster-whisper, whisper_timestamped, openai-api, mlx-whisper} Load only this backend for Whisper processing.--vacUse VAC = voice activity controller. Requires torch.--vac-chunk-sizeVAC sample size in seconds.--vadUse VAD = voice activity detection, with the default parameters.--buffer_trimming{sentence, segment} Buffer trimming strategy -- trim completed sentences marked with punctuation mark and detected by sentence segmenter, or the completed segments returned by Whisper. Sentence segmenter must be installed for "sentence" option.--buffer_trimming_secBuffer trimming length threshold in seconds. If buffer length is longer, trimming sentence/segment is triggered.
-
Open the Provided HTML:
- By default, the server root endpoint
/serves a simplelive_transcription.htmlpage. - Open your browser at
http://localhost:8000(or replacelocalhostand8000with whatever you specified). - The page uses vanilla JavaScript and the WebSocket API to capture your microphone and stream audio to the server in real time.
- By default, the server root endpoint
How the Live Interface Works
- Once you allow microphone access, the page records small chunks of audio using the MediaRecorder API in webm/opus format.
- These chunks are sent over a WebSocket to the FastAPI endpoint at
/asr. - The Python server decodes
.webmchunks on the fly using FFmpeg and streams them into the whisper streaming implementation for transcription. - Partial transcription appears as soon as enough audio is processed. The "unvalidated" text is shown in lighter or grey color (i.e., an 'aperçu') to indicate it's still buffered partial output. Once Whisper finalizes that segment, it's displayed in normal text.
- You can watch the transcription update in near real time, ideal for demos, prototyping, or quick debugging.
Deploying to a Remote Server
If you want to deploy this setup:
- Host the FastAPI app behind a production-grade HTTP(S) server (like Uvicorn + Nginx or Docker). If you use HTTPS, use "wss" instead of "ws" in WebSocket URL.
- The HTML/JS page can be served by the same FastAPI app or a separate static host.
- Users open the page in Chrome/Firefox (any modern browser that supports MediaRecorder + WebSocket).
No additional front-end libraries or frameworks are required. The WebSocket logic in live_transcription.html is minimal enough to adapt for your own custom UI or embed in other pages.
Acknowledgments
This project builds upon the foundational work of the Whisper Streaming project. We extend our gratitude to the original authors for their contributions.